Cute Scrunchie Sewing Tutorial
- Happy Hour Stitches
- Jun 1, 2024
- 2 min read

Scrunchies never go out of style! Whip up these cute accessories as a fashionable accessory for yourself or a child using your favorite fabrics! Scrunchies are so easy and fun to make -- and they make great gifts!
I've shared step-by-step photos and a video tutorial below, so keep reading!
Special Discount!
I made this project in partnership with Missouri Star Quilt Company! Get 20% off your order of $50 or more at Missouri Star in March by shopping using my affiliate link below. (No coupon code needed. The discount is automatically applied at checkout. Only available on eligible items.)
Materials:
(1) 3.5x20” strip of fabric (kid size) or (1) 3.5x24” strip of fabric (adult size)
(1) 6”-long, 1/4"-wide piece of elastic (kid) or (1) 7”-long, 1/4"-wide piece of elastic (adult)
(2) Safety pins
Sewing pins
Thread that matches your fabric

Assemble the Scrunchie
Fold your strip of fabric in half lengthwise with right sides together. Press.

2. Sew along the raw edges of the folded strip using a 1/4" seam allowance to make a tube, leaving approximately 2" unsewn at each end. Backstitch at the beginning and end to secure your stitches.

3. Use a safety pin secured to one end of the tube to turn the tube right side out. (See video tutorial below for more on this technique.)

4. Fold the tube in half widthwise with the seams facing out. Align the two unsewn ends right sides together and pin in place.

5. Sew along the unsewn ends using a 1/4" seam. Backstitch at the beginning and end to secure your stitches.

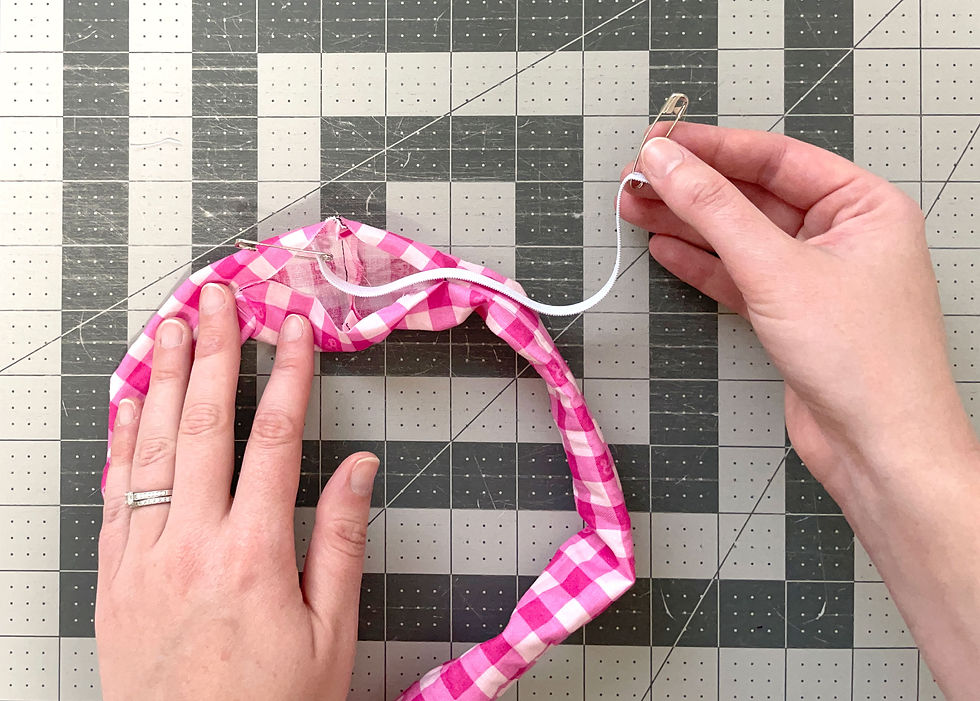
6. To thread the elastic piece through the tube, secure one end of the elastic to the opening of the tube using a safety pin. Secure a second safety pin to the opposite end of the elastic and thread it through the tube until it comes out the other side.
7. Overlap the elastic ends by approximately 3/8". Pin the elastic ends together. Sew both ends of the elastic together, backstitching to secure the stitches.

8. Allow the elastic to scrunch back inside the fabric tube. Turn the open edges of the tube under 1/4" and pin in place.

9. Sew the open edges closed to finish the scrunchie!
Note: I'm using a black thread in these images, so you can see my stitches. On your project, use a matching thread to hide your sewing.

Video Tutorial
Lindsay walks you through making this Cute Scrunchie!
If you make this scrunchie, be sure to share them on social media using the hashtag #HappyHourStitches.
Thanks for joining me for "happy hour",
Lindsay

This blog contains affiliate links to Missouri Star Quilt Company. I only recommend products I truly use and love. If you use my affiliate links, I may receive a small commission.
Commenti